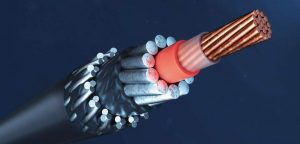
If you’ve been in the wireline business for a while, you know that a solid cable-head connection is the backbone of any successful logging run.When done correctly, it goes unnoticed; yet, when done incorrectly, it may quickly become a nightmare. Improperly seated cones, kinked armors, or a rushed re-head job can all lead to major issues. So, let’s walk through the process of cased hole cable-head construction for coated or greaseless wireline and talk about what makes the difference between a job well done and a potential disaster.
Why Cable-Head Construction Matters?
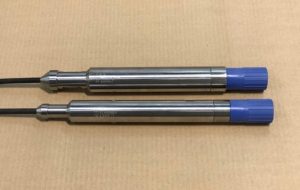
The cable-head serves as both the electrical and mechanical link between the coated/greaseless wireline and the toolstring. It has to withstand extreme downhole conditions while ensuring reliable data transmission. There is no way to cut shortcuts here; you have to do things by the book or you could lose pricey gear and important logging data.
Step 1: Re-Heading the Wireline
Re-heading is essential, and it’s recommended every 40 runs or sooner if you’re exceeding 3,500 lbs. of tension. The key steps involve:
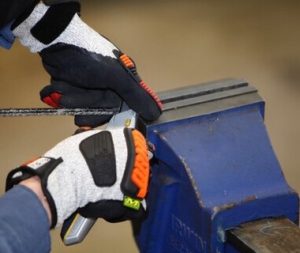
- Removing the outer jacket (use sharp blades and take your time!)
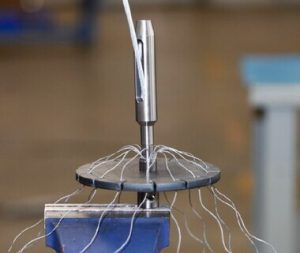
- Separating and aligning the outer and inner armors (no crossing or kinking!)
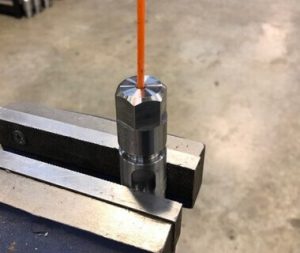
- Installing the inner and outer cone assembly
- Connecting the teardrop pin sub to the wire that carries electricity
- Greasing and sealing the cable-head body
Every step has to be perfect; if the jacket is cut wrong, the cone is out of line, or the armor is crossed, the whole connection could be weak.
Step 2: Quality Control & Safety
Checking and double-checking your work is key to ensuring a reliable connection. Here are a few important considerations:
- Alignment Matters: If the armors aren’t evenly distributed around the cones, the connection may weaken, leading to uneven stress distribution and premature failure.
- Torque is Crucial: The cap must be torqued to spec. Too loose and the assembly will slip; too tight and the components may be damaged.
- Never Skip Greasing: Even with a greaseless wireline, proper sealing with grease prevents wellbore fluid contamination and ensures long-term integrity.
Tools of the Trade
A job is only as good as the tools you use. Here are some essentials:
- Triangle file & utility knife (precision cuts matter)
- Inner and outer cone driving tools (proper seating of cones)
- Torque wrench with a crow’s foot (essential for correct tension)
- Wire stripper & side cutters (clean conductor wire prep)
- Multimeter & insulation tester (verify electrical integrity)
Final Assembly: The Moment of Truth
The last few steps are where things often go wrong. You’ll want to:
- Carefully coil the conductor wire around the teardrop pin – this ensures a solid electrical connection.
- Tighten the teardrop sub without rotating it – turning it can twist and damage the conductor inside.
- Install anti-rotation screws properly – if they’re not aligned, the toolstring can detach at the worst possible moment.
- Fill the cable-head body with grease – even for coated or greaseless wirelines, this step protects against fluid ingress and component wear.
Lessons from the Field
Rushing through this process often leads to mistakes. A good rule of thumb is: slow is smooth, and smooth is fast. Check each step twice, analyze every component, and if something feels wrong, stop and fix it. Taking the time to do it right the first time will save countless hours and avoid unnecessary headaches later.
Next time you’re out in the field, take pride in your cable-head work. A well-built cable-head does more than just get the job done; it also ensures safety, dependability, and keeps expensive instruments where they belong: at the end of the wireline, not at the bottom of the well.
I’m grateful for the opportunity to share insights on coated and greaseless wireline cable-head construction on this platform. For those looking to deepen their knowledge, I highly recommend checking out the Greaseless Wireline Essentials —you can find more details click on the picture below: